STEP 1 – Installation
- 1.1 – Download and install TortoiseSVN
- 1.2 – Donwload VisualSVN
- 1.3 – Install VisualSVN
- 1.4 – Specify SVN repository destination (ie. /wamp/www/mysvn)
STEP 2 – Create SVN Repo
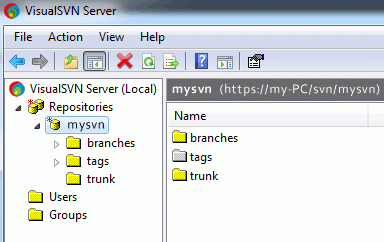
- 2.1 – Open VisualSVN Server
- 2.2 – Right click on ‘Repositories’ icon (or in menu ‘Action -> Create New Repository…’)
- 2.3 – Specify any name for repository
- 2.4 – Select checkbox – ‘Create default structure (trunk, branches, tags)’
- 2.5 – Right click on ‘Users’ icon (or in menu ‘Action -> Create User…’)
- 2.6 – Specify username and password, click on ‘Ok’ button
STEP 3 – SVN Checkout
- 3.1 – Go to /wamp/www/myproject
- 3.2 – Right click and click on ‘SVN Checkout’
- 3.3 – Specify the repository URL (ie. https://my-PC/svn/mysvn/trunk)
- 3.4 – Verify that the checkout directory is correct
- 3.5 – You will be asked for username and password (created in STEP 2), provide it
STEP 4 – SVN Checkin
- 4.1 – Put files, folders, images you want to be in SVN
- 4.2 – Select file/folder, right click and click on ‘TortoiseSVN -> Add’
- 4.3 – Select newly added file/folder, right click and click on ‘SVN Commit’
- 4.4 – You will be asked for username and password (created in STEP 2), provide it

Leave a Reply